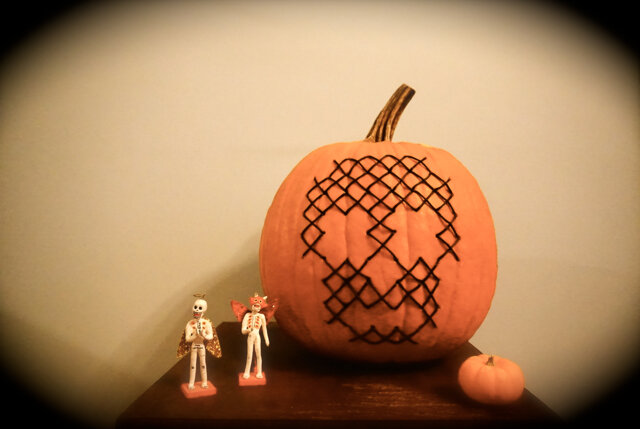
Who doesn’t want a cross-stitched pumpkin?
I thought I would try a new approach to this years pumpkin carving day. Why carve when you can stitch?! It was not super easy but after lots of trial and error I can save you the trouble (and bandaids) and your experience should be pleasant, relatively quick, and mostly pain free!

Materials
A Large Pumpkin
Big ole knife
Spoon
Drill with 1/8" bit
Masking tape
Scissors
11 yards of black silk cord
3 ¾" yarn needle
Embroidery Needle
Pattern
Sharpie

Step 1
Use your big ole knife and spoon to cut and gut your pumpkin like you would if you were carving it.

Step 2
Map out your pattern on some grid paper. I used 4"x4" grid squares. I stuck with a pretty basic skull and highly suggest using a pattern that is simple and under 40 cross stitches. I used my sharpie to mark the spots where I would need to poke the holes.

Step 3
Tape your pattern carefully onto the pumpkin face doing your best to keep it as flat as possible.

Step 4
Use a hefty embroidery needle to mark the spots where you will drill your holes.

Step 5
Remove the pattern.

Step 6
Use the drill to make sure the holes are big enough and go all the way through the pumpkin.

Step 7
Thread your yarn needle with the black silk cord. Knot the end and use your pattern to begin stitching your pumpkin. (I’m assuming you already know how to cross stitch but if not…here you go.)

A tip: To help you find the holes when stitching from the inside out, I used a smaller drill bit and pushed it through the hole from the outside in so that I could identify the hole and push the needles through.

Fanciest pumpkin on the street.